09. januar 2026 | 1027 visning(er) | 0 personer fandt dette nyttigt
Planlæg Webex Webinars
Har du feedback?
Som vært eller medvært kan du planlægge webinarer. Webinarer er interaktive og meget engagerende. Hvis dit arrangement kræver en enklere oplevelse for deltagerne, er webinarer i webcast-visning den rigtige løsning. Planlæg disse hurtigt med det grundlæggende, eller brug lidt mere tid på at tilpasse dem ved hjælp af avancerede muligheder for at skræddersy webinarer til dine behov.
Antallet af personer, du kan invitere til et webinar , afhænger af den købte licens. Webinarer kan omfatte op til 10.000 personer. Planlæg et webinar i webcast-visning for mere end 10.000 deltagere.
Webinarer i webcast-visning er ikke tilgængelige for Webex til forvaltninger.
Når du har planlagt et webinar, modtager du en bekræftelsesmail og en mail, du skal videresende til deltagerne.
1
Log ind på Brugerhub, klik på fanen Møder, klik derefter på rullemenuen Planlæg, og vælg Planlæg et webinar.
2
(Valgfrit) Hvis du har gemte webinarskabeloner, skal du vælge en fra rullemenuen Webinarskabeloner.
3
Tilføj det grundlæggende ved at angive følgende oplysninger:
Emne— Vælg et emne, som folk genkender og bliver begejstrede for.
Dato og klokkeslæt— Angiv, hvornår webinaret finder sted. Hvis du inviterer personer fra forskellige tidszoner, skal du klikke på Tidszoneplanlæggeren, så du kan finde et tidspunkt, der fungerer bedst for alle.
Maksimalt antal deltagere– Vælg det maksimale antal deltagere, og om du vil have et webinar i webcast-visning. Se Sammenlign oplevelser i Webex-webinarer for yderligere information.
Paneldeltagere– Indtast e-mailadresserne på de personer, du inviterer til at hjælpe dig med at afholde dit webinar. Du kan have op til 500 paneldeltagere i din webinar. Hvis de har en konto på dette websted, kan du vælge ved siden af deres navn, hvis du ønsker, at de skal være en cohost.
Det maksimale antal paneldeltagere til webinarer i Webex Suite-mødeplatformen er begrænset til 100.
Webinardagsorden— Tilføj kontekst eller detaljer, som du ønsker, at dine deltagere skal have om det kommende webinar.
Feltet Webinarandagsorden understøtter maksimalt 2.500 tegn. Sørg for, at din dagsorden ikke overstiger denne grænse, når du planlægger dit webinar.
4
I afsnittet Sikkerhed skal du tilføje følgende oplysninger:
Webinaradgangskode— Brug den angivne adgangskode, eller indtast din egen. Mødedeltagere skal indtaste denne adgangskode for at deltage i din webinar.
Paneldeltageradgangskode— Brug den angivne adgangskode, eller indtast din egen. Paneldeltagere skal indtaste denne adgangskode for at være en del af dit webinarpanel . Hvis paneldeltagerne ikke indtaster denne adgangskode, når de deltager i dit webinar, deltager de som deltagere.
Hvis en paneldeltager har en konto på det samme websted, hvor webinaret afholdes, skal de logge ind. Hvis de ikke har en konto på samme websted, vises en prompt, hvor de skal indtaste denne paneldeltageradgangskode.
Deltag før vært– Tillad paneldeltagere og deltagere at deltage i dit webinar, og paneldeltagere at forbinde deres lyd, før webinaret starter.
Kræv konto– Hvis du ønsker, at deltagerne skal have en Webex-konto på dette websted for at kunne deltage i webinaret, skal du markere dette afkrydsningsfelt.
Markér Begræns webinar til kun inviterede deltagere, hvis du kun vil begrænse webinaret til inviterede deltagere. Dette deaktiverer webinar tilmeldingsmuligheder.
5
I afsnittet Valgmuligheder for lydtilslutning skal du tilføje følgende oplysninger:
Type af lydtilslutning
Webex-lyd – Vælg at understøtte opkald ind, tilbagekald og computerlyd. Derefter kan du inkludere gratis og globale opkaldsnumre og indstille ind- og udgangstoner, som kan høres, når nogen deltager i eller forlader webinaren.
Når du bruger Webex-lyd med funktionen Annoncer navn, kan paneldeltagere, der vælger indstillingen Brug computer til lyd, ikke optage og annoncere deres navne.
Brug VoIP – Begrænser alle paneldeltagere til at bruge computerlyd.
Anden telekonferencetjeneste – giver dig mulighed for at indtaste tredjeparts-telekonferenceoplysninger.
Ingen – Ingen lyd.
Slå paneldeltagers lyd fra
Tillad værten og medværterne at slå lyden til for deltagere (modereret tilslutningstilstand) – Værter og medværter kan slå lyden til for deltagere og SIP-baserede videoenheder direkte uden at sende en anmodning om at slå lyden til.
Tillad paneldeltagere at slå lyden til i webinaret – Hvis du vælger at slå lyden til paneldeltagere, når de deltager, skal du vælge denne indstilling for at tillade dem at slå lyden til under webinaret.
Vælg ikke denne valgmulighed, hvis du kun ønsker, at værten eller cohost kan slå lyden til paneldeltagerne.
Slå altid paneldeltagere fra, når de deltager i webinaret – slår automatisk paneldeltagere fra, når de deltager i webinaret.
6
Klik på Avancerede valgmuligheder for at tilføje et øvesession, aktivere undersessioner, tilføje denne webinartil en eksisterende serie eller en ny serie, du opretter, aktivere samtidig tolkning, kræve tilmelding, sende e-mailpåmindelser med mere.
7
Klik på Planlæg for at planlægge dit webinar.
Når du planlægger et webinar, modtager deltagerne automatisk e-mail-påmindelser ved hjælp af standardskabelonen. Hvis du foretrækker at tilpasse din e-mailskabelon og sende påmindelser senere, skal du fjerne markeringen i Send automatisk e-mailinvitationer til alle deltagere efter at have klikket på Planlægog derefter følge instruktionerne i Tilpas e-mailskabeloner i Webex Webinars.
Når du har planlagt webinaret, kan du vælge det fra din kalender og gøre et af følgende:
Når du har planlagt webinaret, kan du klikke på for at downloade en .ics-fil eller tilføje webinaret til din Google- eller Microsoft Office 365-kalender.
9
Du modtager en e-mail, som du skal videresende til deltagerne for at invitere dem til webinaret.
Når du har planlagt dit webinar, skal du klikke på Gem som skabelon for at gemme disse muligheder som en skabelon til senere brug.

 Har du feedback?
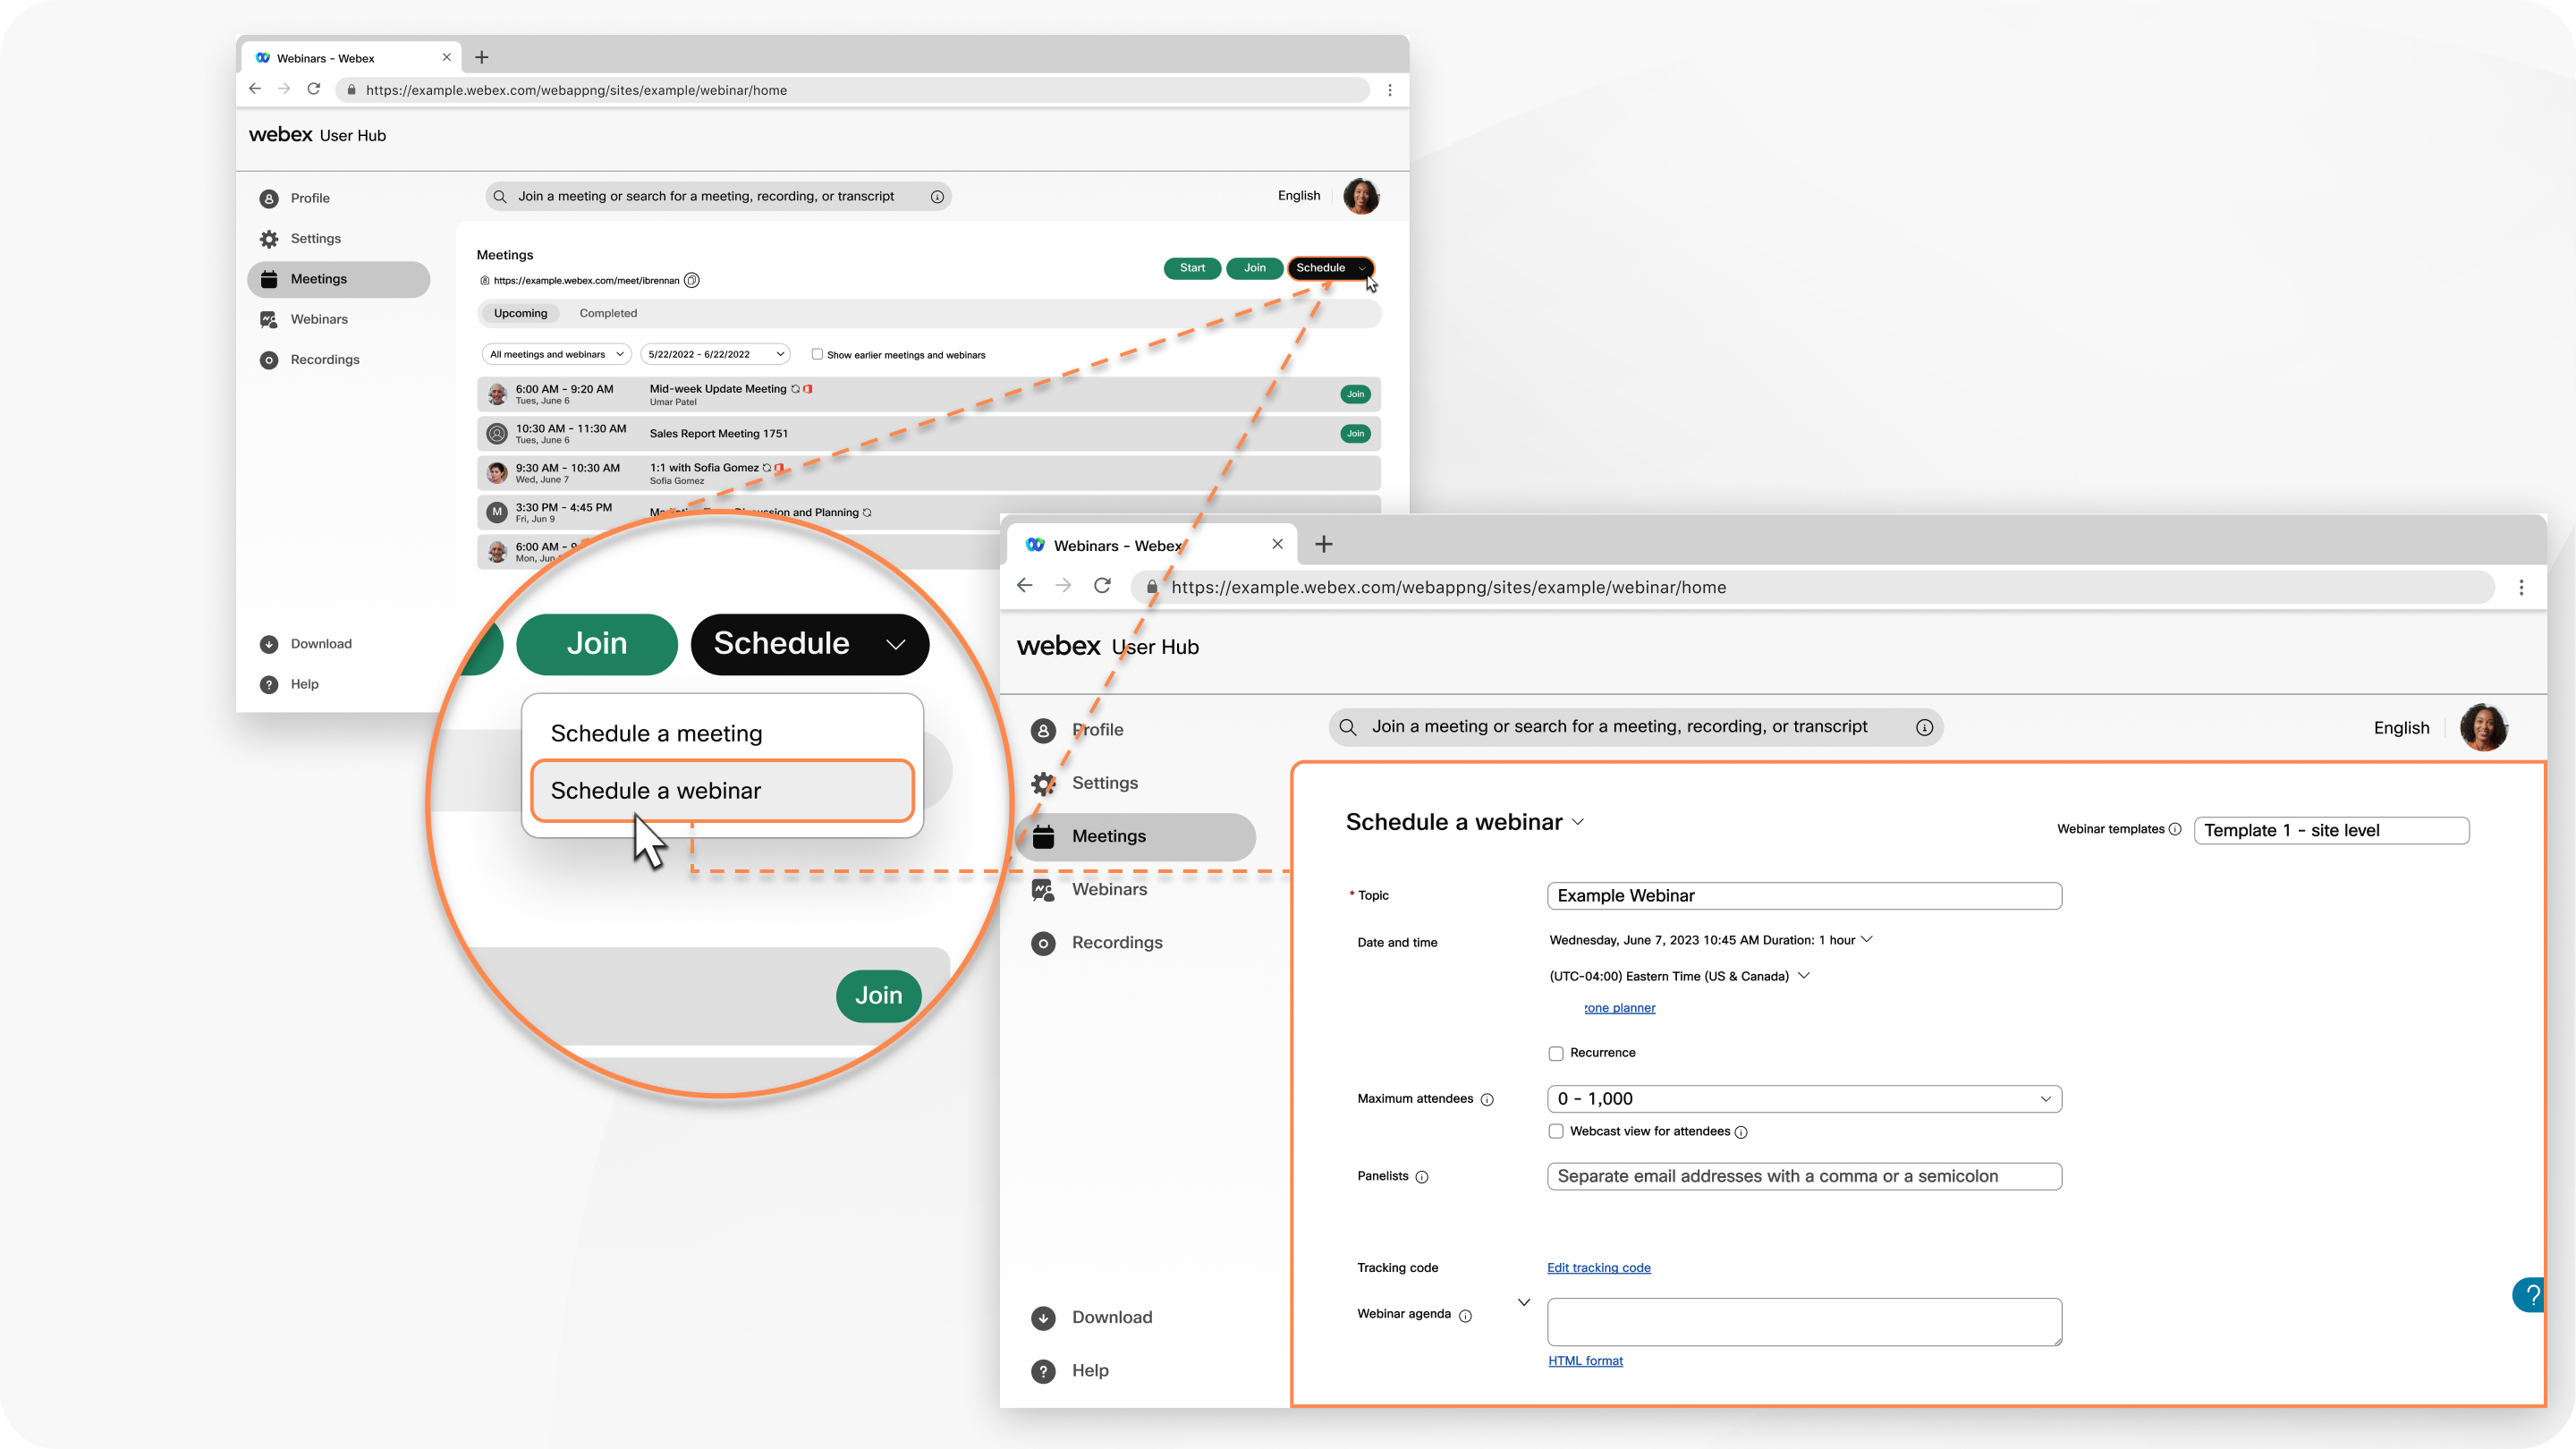
 siden af deres navn, hvis du ønsker, at de skal være en cohost.
  for at downloade en .ics-fil eller tilføje webinaret til din Google- eller Microsoft Office 365-kalender.


