schedule a webinar

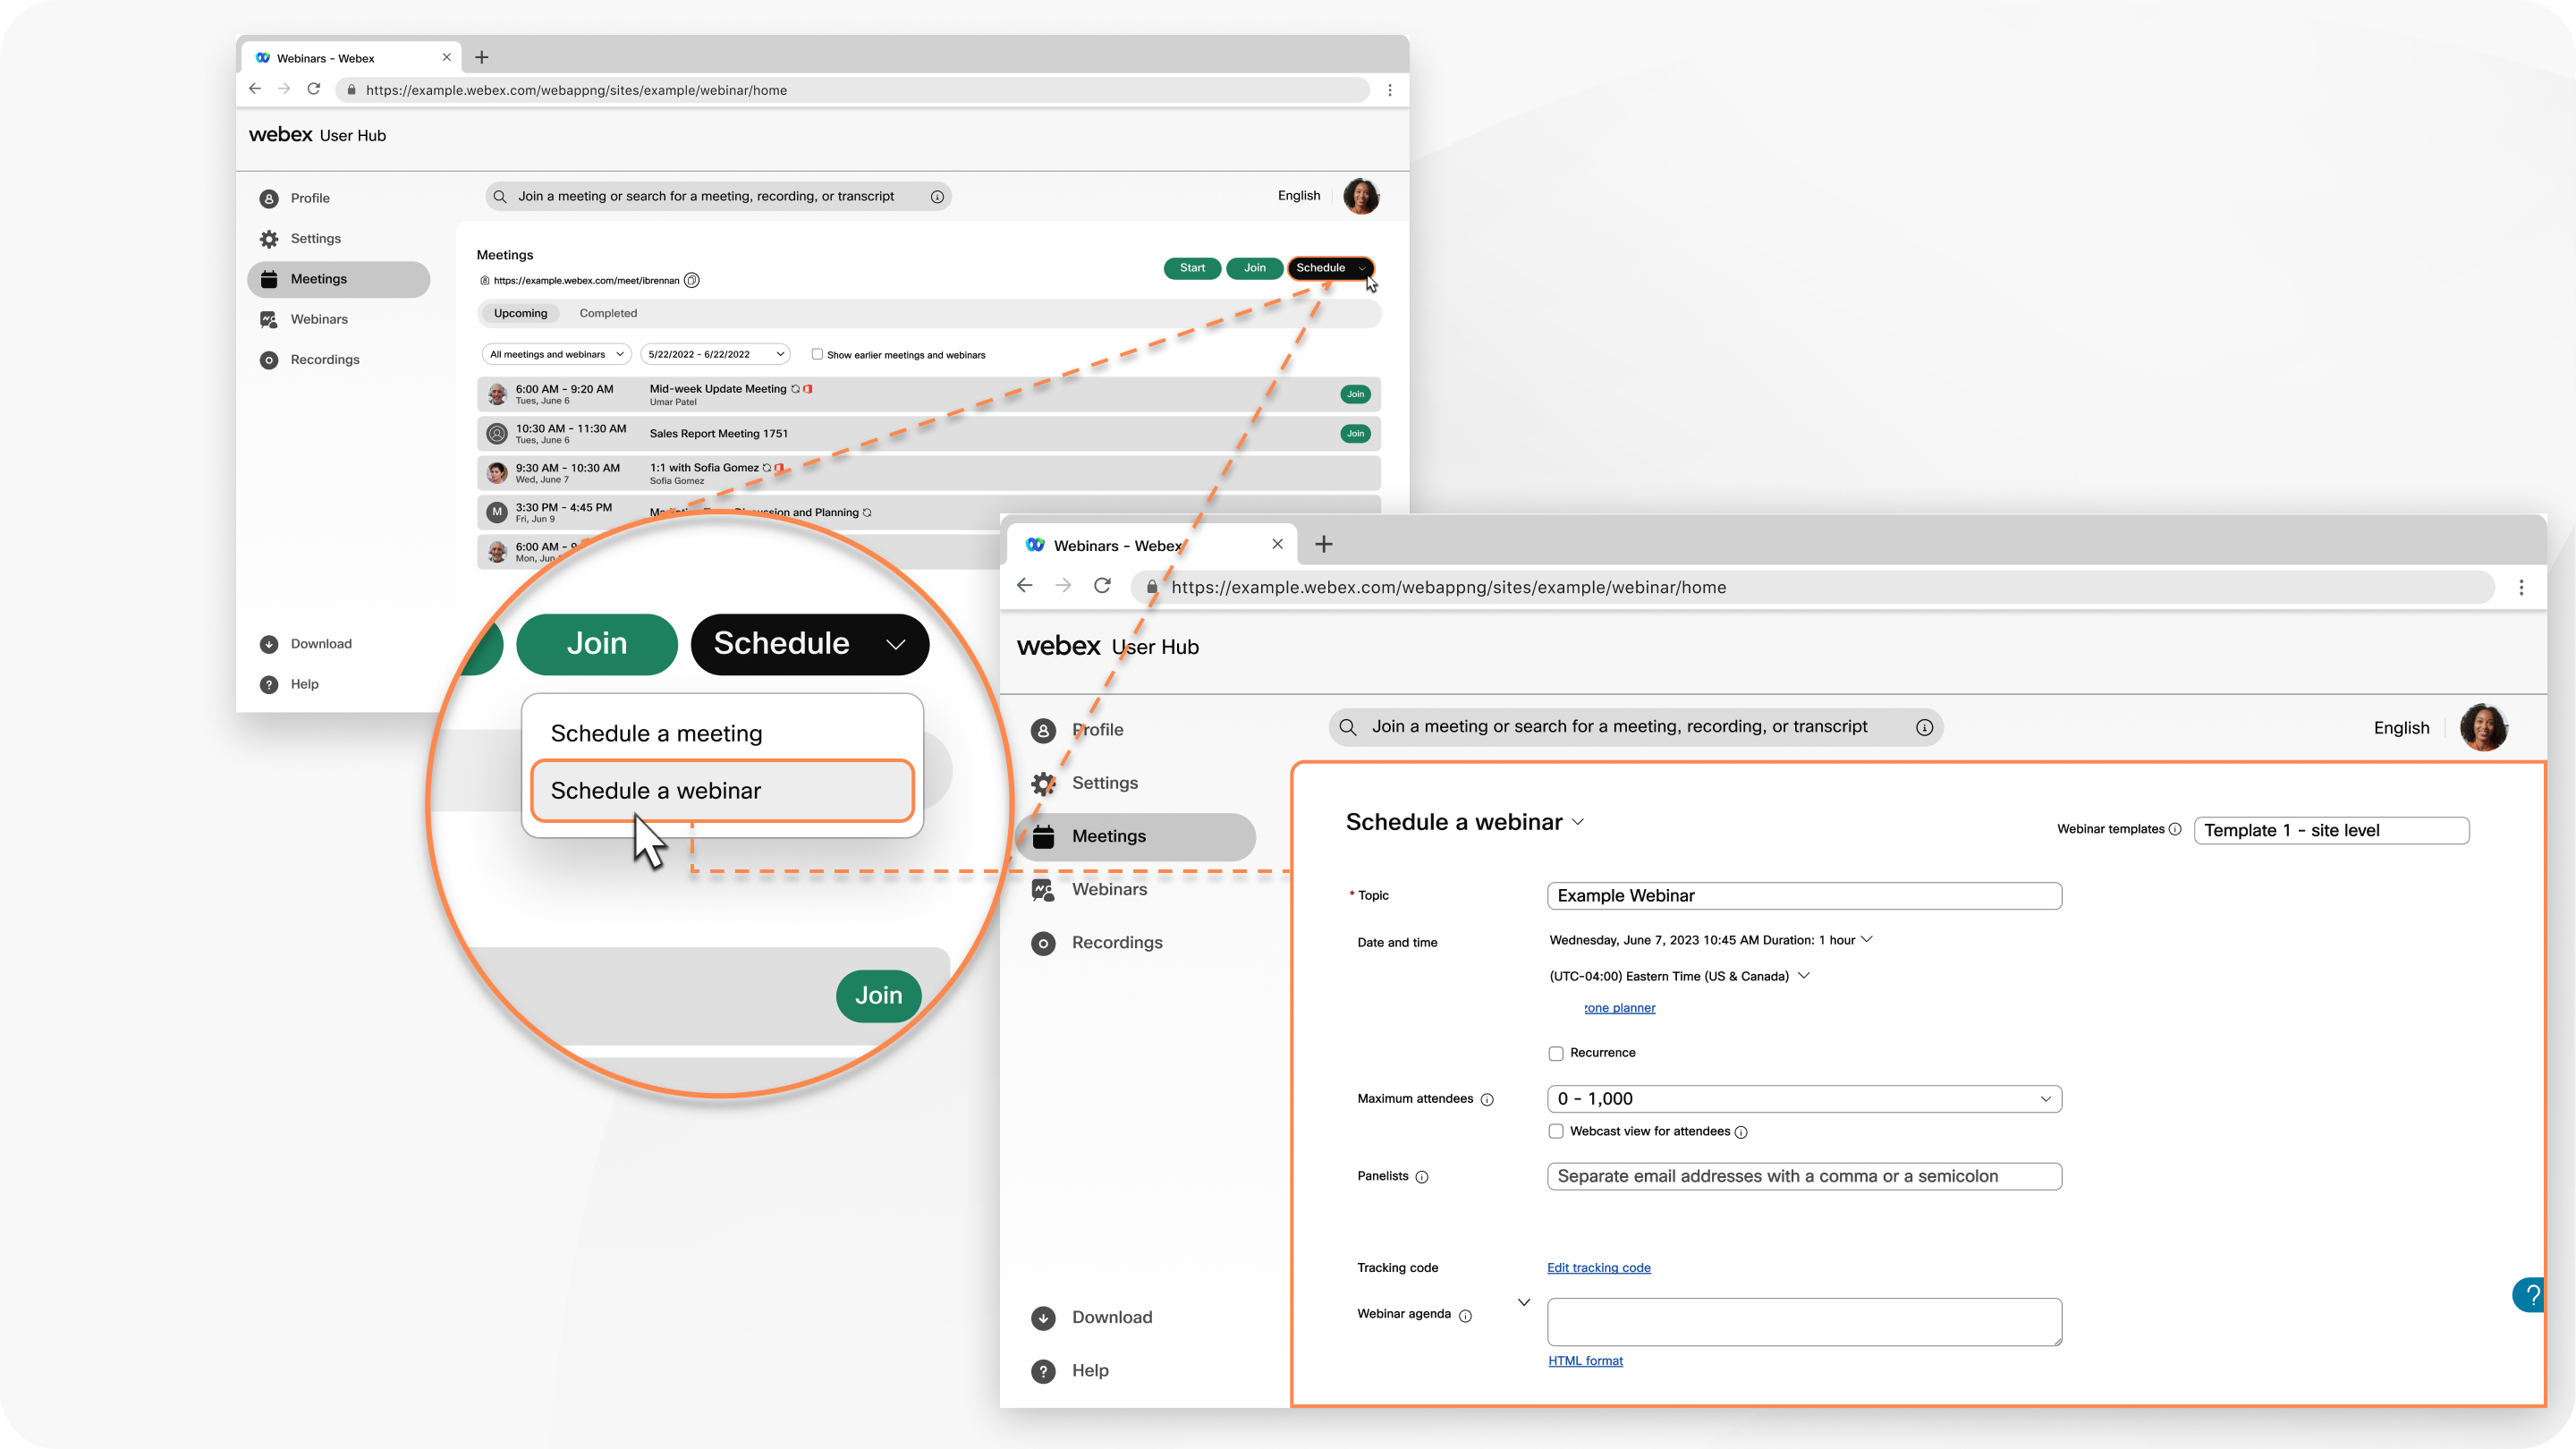
웨 비나에 초대할 수 있는 사용자의 수는 구입한 라이센스에 따라 다를 수 있습니다. Webinars는 최대 10,000명의 사용자를 포함할 수 있습니다. Schedule a webinar in webcast view for more than 10,000 attendees.

웹캐스트 보기의 웨비나는 정부용 Webex에서 사용할 수 없습니다.

After you schedule a webinar, you get a confirmation email, and an email to forward to attendees.

1

Sign in to User Hub, click the Meetings tab, then click the Schedule drop-down menu and select Schedule a webinar.

2

(Optional) If you have any saved webinar templates, select one from the Webinar templates drop-down menu.

3

다음 정보를 제공하여 기본 항목을 추가합니다.

  • Topic—Choose a topic that people recognize and get excited about.
  • Date and time—Indicate when the webinartakes place. 다른 시간대에 있는 사용자를 초대하는 경우, 시간대 플래너를 클릭하면 모든 사람에게 가장 적합한 시간을 찾을 수 있습니다.
  • Maximum attendees—Choose the maximum number of attendees and whether you want a webinar in webcast view. See Compare experiences in Webex Webinars for more information.
  • Panelists—Enter the email addresses of the people you’re inviting to help you run your webinar. 웨비나에서 최대 500명 토론자까지 사용할 수 있습니다. 해당 사용자가 이 사이트에 계정을 갖고 있는 경우, 공동 호스트가 되게 하려면 이름 옆에 있는 을(를) 선택할 수 있습니다.
  • Webinar agenda—Add any context or details that you want your attendees to have about the upcoming webinar.
4

보안 섹션 에서 다음 정보를 추가합니다.

  • Webinar password—Use the provided password or enter your own. 참석자가 웨비나에 참여하려면 이 비밀번호를 입력해야 합니다.
  • Panelist password—Use the provided password or enter your own. 토론자가 웨비나 목록의 일원이 되려면 이 비밀번호를 입력해야 합니다. If panelists don't enter this password when they join your webinar, they join as an attendee.

    If a panelist has an account on the same site where the webinar is hosted, they just have to sign in. If they don't have an account on the same site, a prompt appears to enter this panelist password.

    Check out Roles in Webex Webinars for information about the differences between the various roles.

  • Join before host—Allow panelists and attendees to join your webinar and panelists to connect their audio before the webinar starts.
  • Require account—If you want attendees to have a Webex account on this site to join the webinar, check this check box.

    Check Restrict webinar to invited attendees only if you want to restrict the webinar to invited attendees only. This turns off webinar registration options.

5

오디오 연결 옵션 섹션에서 다음 정보를 추가합니다.

  • 오디오 연결 유형
    • Webex 오디오—발신, 콜백 및 컴퓨터 오디오 옵션을 지원할지 선택합니다. 그 후 무료 번호 및 글로벌 발신 번호를 포함하고, 누군가 웨비나에 참여하거나 나갈 때 재생할 들어올 때와 나갈 때 발신음을 설정할 수도 있습니다.
      When using Webex Audio with the Announce Name feature, panelists who select the Use computer for audio option can't record and announce their names
    • 사용자 VoIP 사용—모든 토론자들이 컴퓨터 오디오를 사용할 수로 제한합니다.
    • 기타 다자원 전화회의 서비스—제3자 다자 전화회의 정보를 입력할 수 있습니다.
    • 없음—오디오 없음.
  • 토론자 음소거
    • Allow the host and cohosts to unmute participants (moderated unmute mode)—Hosts and cohosts can unmute participants and SIP-based video devices directly without sending an unmute request.
    • Allow panelists to unmute themselves in the webinar—If you choose to mute panelists when they join, select this option to allow them to unmute themselves during the webinar.
      • 호스트 또는 코호스트만 토론자에 대해 을(를)mm 퇴출할 수 있게 하려는 경우엔 이 옵션을 선택하지 않습니다.
    • Always mute panelists when they join the webinar—automatically mutes panelists when they join the webinar.
6

고급 옵션을 클릭하여 실습 세션, 자세한 세션 활성화, 기존 시리즈 또는 생성하는 새 시리즈에 이 웨비나 추가, 동시 해석 켜기, 등록 요구, 이메일 알림 보내기 등.

7

Click Schedule to schedule your webinar.

When you schedule a webinar, attendees automatically receive email reminders using the default template. If you prefer to customize your email template and send reminders later, uncheck Automatically send email invitations to all participants after clicking Schedule, then follow the instructions in Customize email templates in Webex Webinars.

After you schedule the webinar, you can select it from your calendar and do one of the following:
8

After you schedule the webinar, you can click to download an .ics file, or add the webinar to your Google or Microsoft Office 365 Calendar.

9

You receive an email to forward to attendees to invite them to the webinar.

After you schedule your webinar, click Save as template to save these options as a template for future use.