schedule a webinar

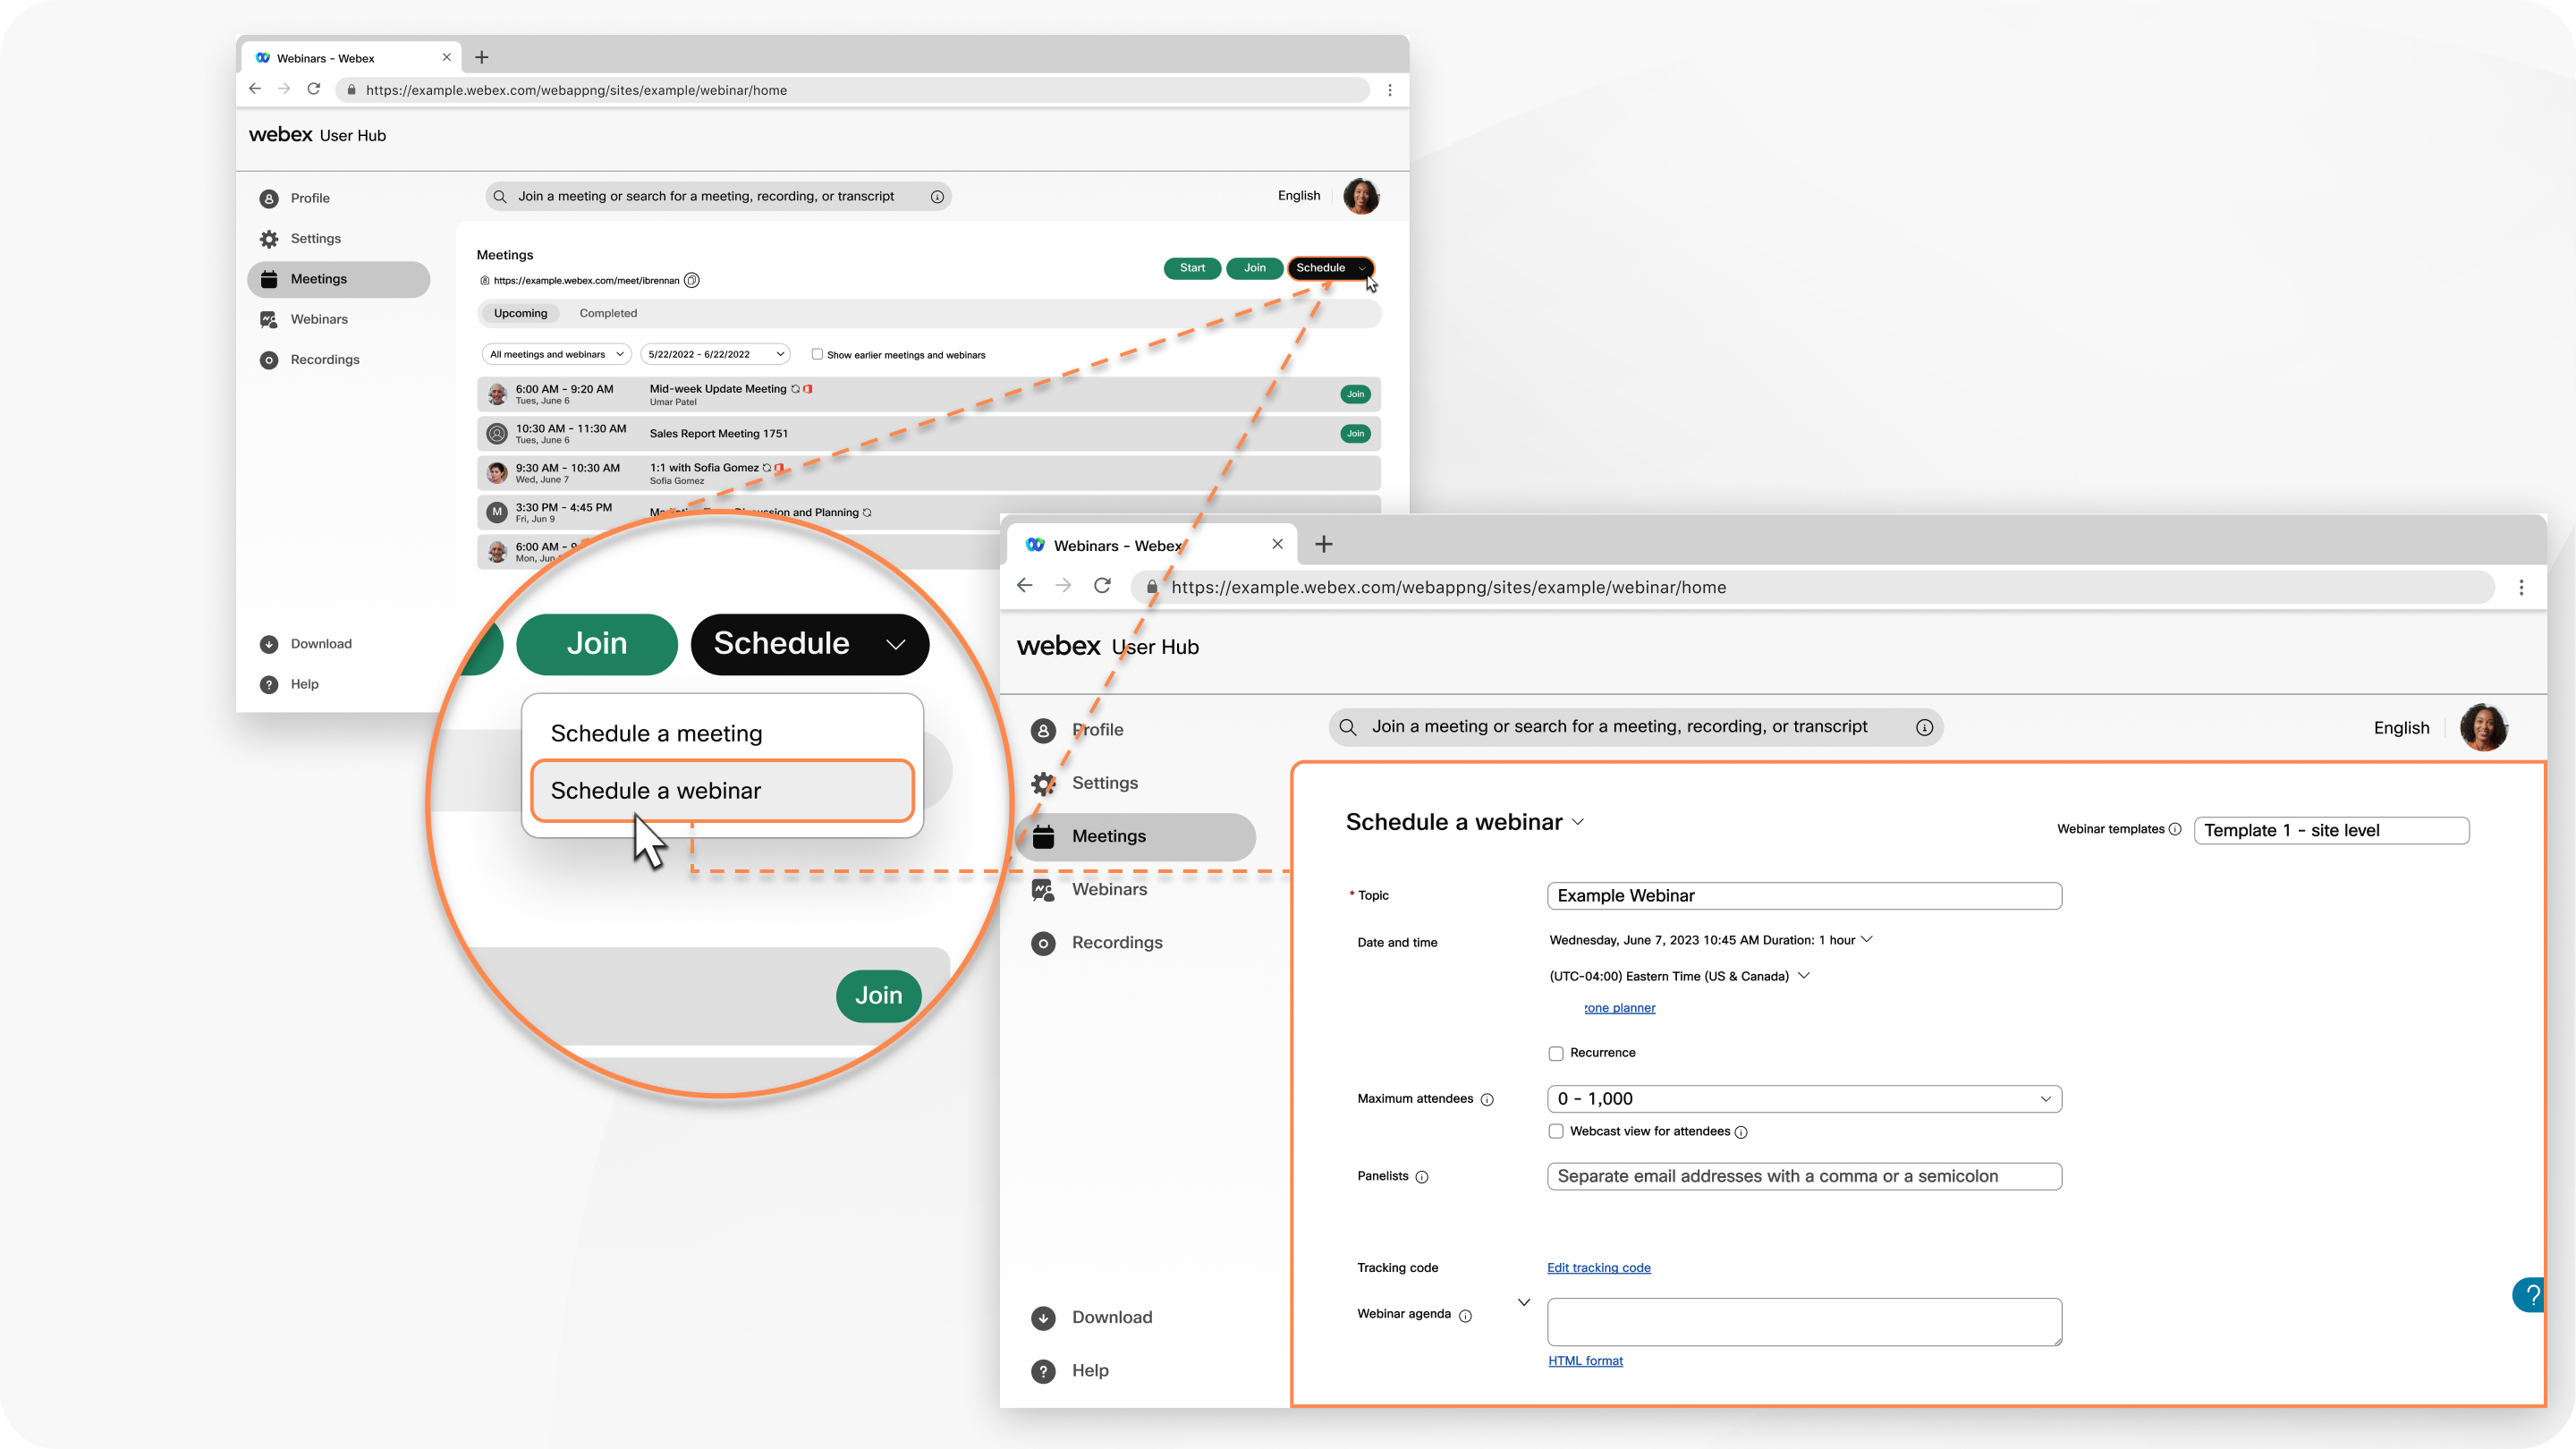
Het aantal personen dat u kunt uitnodigen voor een webinar is afhankelijk van de aangeschafte licentie. Webinars kunnen tot 10,000 personen omvatten. Schedule a webinar in webcast view for more than 10,000 attendees.

Webinars in de webcastweergave zijn niet beschikbaar voor Webex voor de overheid.

After you schedule a webinar, you get a confirmation email, and an email to forward to attendees.

1

Sign in to User Hub, click the Meetings tab, then click the Schedule drop-down menu and select Schedule a webinar.

2

(Optional) If you have any saved webinar templates, select one from the Webinar templates drop-down menu.

3

Voeg de basisprincipes toe door de volgende informatie op te geven:

  • Topic—Choose a topic that people recognize and get excited about.
  • Date and time—Indicate when the webinartakes place. Als u personen uit verschillende tijdzones uitnodigt, klikt u op de tijdzone-planner zodat u een tijd vindt die het meest voor iedereen werkt.
  • Maximum attendees—Choose the maximum number of attendees and whether you want a webinar in webcast view. See Compare experiences in Webex Webinars for more information.
  • Panelists—Enter the email addresses of the people you’re inviting to help you run your webinar. U kunt maximaal 500 panelleden via uw webinar houden. Als de host een account op deze site heeft, kunt u naast de naam selecteren als u wilt dat deze een cohost is.
  • Webinar agenda—Add any context or details that you want your attendees to have about the upcoming webinar.
4

Voeg in het gedeelte Beveiliging de volgende informatie toe:

  • Webinar password—Use the provided password or enter your own. Deelnemers moeten dit wachtwoord invoeren om deel te kunnen nemen aan uw webinar.
  • Panelist password—Use the provided password or enter your own. Panelleden moeten dit wachtwoord invoeren om deel te kunnen uitmaken van uw webinarpaneel . If panelists don't enter this password when they join your webinar, they join as an attendee.

    If a panelist has an account on the same site where the webinar is hosted, they just have to sign in. If they don't have an account on the same site, a prompt appears to enter this panelist password.

    Check out Roles in Webex Webinars for information about the differences between the various roles.

  • Join before host—Allow panelists and attendees to join your webinar and panelists to connect their audio before the webinar starts.
  • Require account—If you want attendees to have a Webex account on this site to join the webinar, check this check box.

    Check Restrict webinar to invited attendees only if you want to restrict the webinar to invited attendees only. This turns off webinar registration options.

5

Voeg in het gedeelte Opties voor audioverbinding de volgende informatie toe:

  • Type audioverbinding
    • Webex-audio: kies ervoor om de audio-opties voor in bellen, terug bellen en computeraudio te ondersteunen. U kunt ook gratis en wereldwijde in belnummers opnemen en de tonen voor deelnemen en verlaten instellen om te horen wanneer iemand deel gaat nemen aan de webinar of deze verlaat .
      When using Webex Audio with the Announce Name feature, panelists who select the Use computer for audio option can't record and announce their names
    • Alleen VoIP gebruiken: beperkt alle panelleden tot het gebruik van computeraudio.
    • Andere teleconferentieservice: hiermee kunt u teleconferentiegegevens van derden invoeren.
    • Geen- Geen audio.
  • Panellid dempen
    • Allow the host and cohosts to unmute participants (moderated unmute mode)—Hosts and cohosts can unmute participants and SIP-based video devices directly without sending an unmute request.
    • Allow panelists to unmute themselves in the webinar—If you choose to mute panelists when they join, select this option to allow them to unmute themselves during the webinar.
      • Schakel deze optie niet in als u wilt dat alleen de host of de cohost het dempen van panelleden kan dempen.
    • Always mute panelists when they join the webinar—automatically mutes panelists when they join the webinar.
6

Klik op Geavanceerde opties om een oefensessie toe te voegen, deelsessies in teschakelen, deze webinar toe te voegen aan een bestaande reeks of een nieuwe reeks die u maakt, het gelijktijdig interpreteren in teschakelen, registratie te vereisen, e-mailherinneringen te verzenden en meer.

7

Click Schedule to schedule your webinar.

When you schedule a webinar, attendees automatically receive email reminders using the default template. If you prefer to customize your email template and send reminders later, uncheck Automatically send email invitations to all participants after clicking Schedule, then follow the instructions in Customize email templates in Webex Webinars.

After you schedule the webinar, you can select it from your calendar and do one of the following:
8

After you schedule the webinar, you can click to download an .ics file, or add the webinar to your Google or Microsoft Office 365 Calendar.

9

You receive an email to forward to attendees to invite them to the webinar.

After you schedule your webinar, click Save as template to save these options as a template for future use.