
Дякуємо за відгук.
Додавання користувачів вручну в Control Hub
 Надіслати відгук?
Ви можете вручну додати до 25 користувачів одночасно, якщо ваша організація не позначила атрибути користувача як обов’язкові, включаючи профіль користувача або власні атрибути. Якщо ваша організація позначила атрибут користувача як обов’язковий, ви можете додавати лише одного користувача за раз.
-
Якщо ви синхронізуєте користувачів з каталогу, такого як Active Directory, ви не можете додавати користувачів вручну в Центрі керування. Використайте З’єднувач каталогів, щоб додати своїх користувачів.
-
Якщо ви придбали підписку через Webex Online (my.webex.com), вам потрібно додати користувачів через Центр користувачів Webex.
Перш ніж почати
Якщо під час спроби додати користувачів, які використовували свою адресу електронної пошти для створення пробного облікового запису, нехай користувачі спочатку видалять свою організацію , перш ніж додавати їх до вашої організації.
| 1 |
Увійдіть у Центркерування. |
| 2 |
Натисніть . |
| 3 |
Виберіть один із наведених нижче параметрів.
|
| 4 |
Створити список: Створіть список користувачів, яких потрібно додати або змінити, а потім натисніть кнопку Далі. Якщо ви використовуєте лише адреси електронної пошти, їх можна розділити комами. Якщо ви також додаєте імена, натисніть кнопку + після кожного запису, щоб додати його до списку. Ви можете додавати користувачів, яких можна заявити про членство у вашій організації. Ви не можете додавати існуючих користувачів у вашій організації або користувачів, які вже мають обліковий запис Webex. |
| 5 |
Призначити ліцензії:
|
| 6 |
Призначити коди відстеження: Якщо ви надали новим користувачам ліцензії на нараду та якщо для їхніх сайтів нарад потрібні коди відстеження, додайте ці коди відстеження до користувачів на наступному екрані майстра. 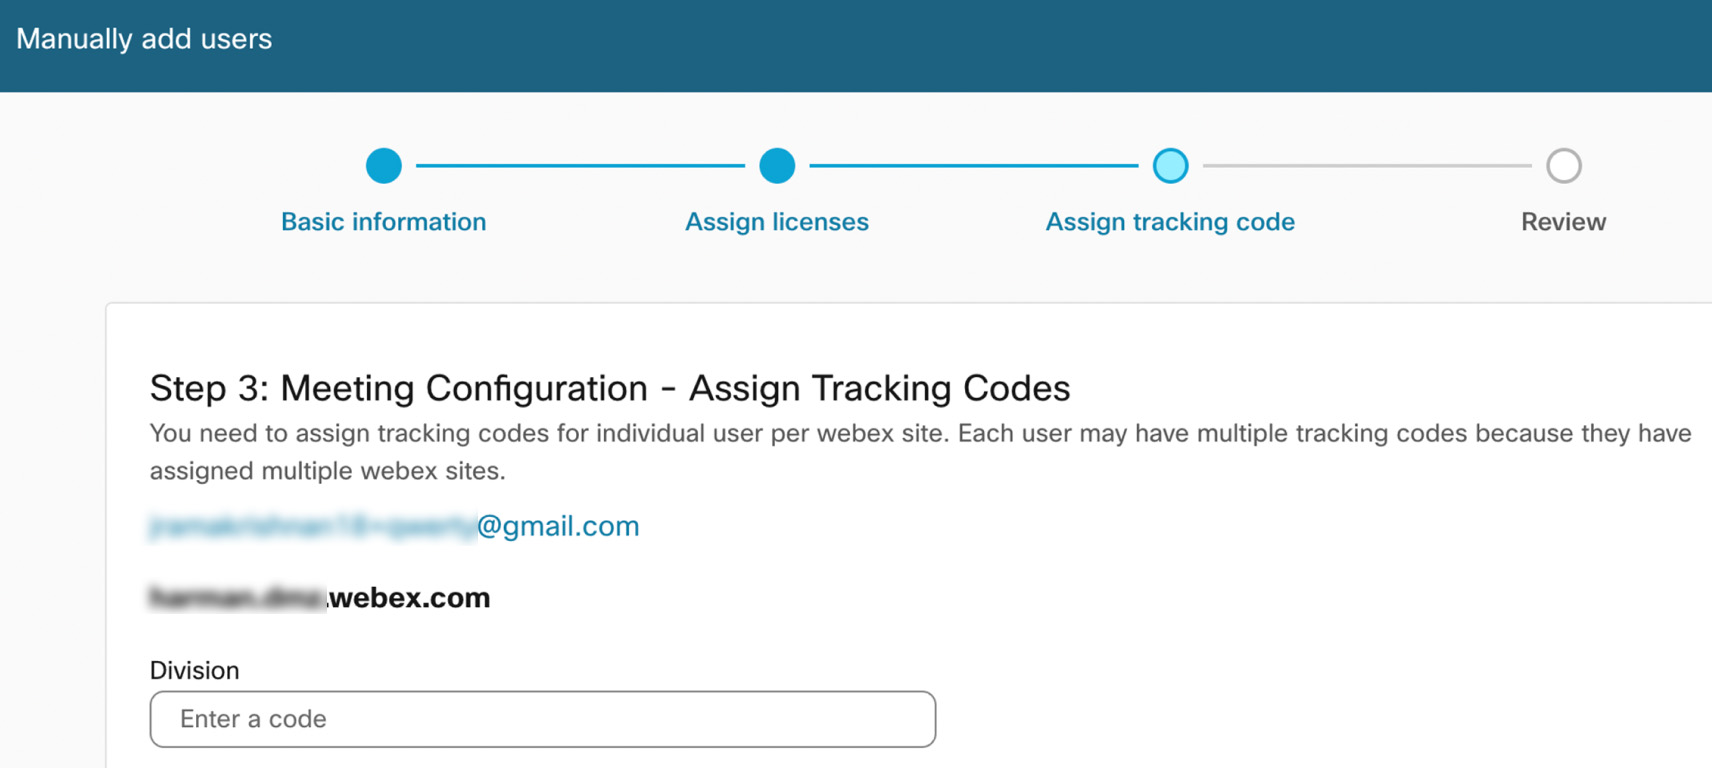 Прочитайте про керування кодамивідстеження. |
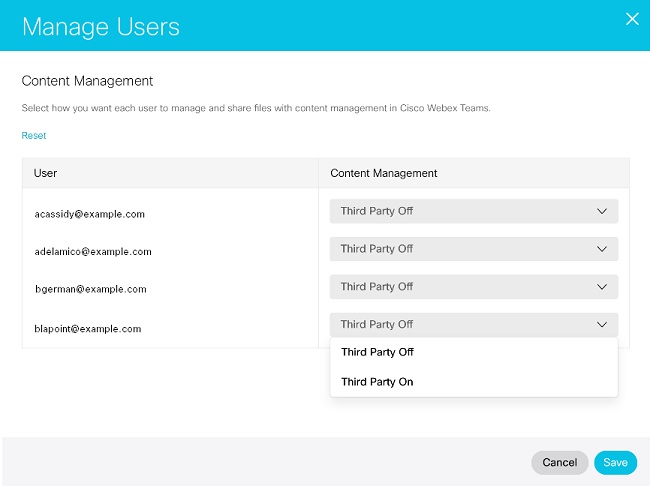
| 7 |
Призначити керування контентом:
|
| 8 |
Перегляньте список користувачів і служб, коли побачите екран Переглянути. |
| 9 |
Натисніть кнопку Додати користувачів.
|
| 10 |
Перегляньте сторінку зведення оброблених записів і натисніть кнопку Готово , щоб вийти з майстра. Під час спроби отримати доступ до настройок виклику для щойно доданого користувача може з'явитися повідомлення про помилку. Ми рекомендуємо видалити ліцензію Webex Calling, а потім перепризначити ліцензію на виклик користувачеві. |
Що далі
Користувачам у вашій організації можна призначити права адміністратора. Перегляньте статтю Призначення ролей облікового запису організації в Центрікерування.
Ви можете призначити ліцензії Webex Meetings для організаторів або учасників користувачам поза вашою організацією. Щоб це зробити, перейдіть на вкладку зовнішніх користувачів і або додайте їх, або виберіть існуючих зовнішніх користувачів, щоб редагувати їх. Користувачі можуть вже бути у списку зовнішніх користувачів, якщо вони вже мають ліцензію Webex Meetings для сайту у вашій організації.
Запрошення щодо прийняття або відхилення ліцензії дійсні протягом 15 днів. Якщо користувачі поза вашою організацією відхилять запрошення або пройде 15 днів, ці користувачі зникнуть зі списку зовнішніх користувачів, якщо вони не мають іншої ліцензії Webex Meetings у вашій організації.
Якщо термін дії запрошення на зустріч закінчується, ви можете надіслати їм інше запрошення, повторно призначивши їм ліцензію Webex Meetings.
Ліцензії Webex Meetings не використовуються, доки користувач не прийме запрошення.
Якщо ви не хочете, щоб ваші користувачі отримували обліковий запис організатора або учасника на сайтах, якими керують інші організації, ви можете вимкнути цей параметр.
Політики Webex Meetings, що застосовуються до зовнішніх користувачів
Наразі зовнішні користувачі дотримуються політик обмеження співпраці власної організації. У майбутньому зовнішні користувачі отримуватимуть найбільш обмежувальне значення політик, встановлених їхньою власною організацією та організацією, яка володіє сайтом.
Перш ніж почати
Організація, до якої належать зовнішні користувачі, повинна дозволити міжорганізаційне ліцензування, перш ніж ви зможете додати цих користувачів до своєї організації.
| 1 |
У режимі перегляду клієнта в https://admin.webex.comперейдіть до розділу Користувачі, а потім виберіть Зовнішні користувачі. |
| 2 |
Виберіть Додати зовнішнього користувача. |
| 3 |
Введіть до 25 адрес електронної пошти. Ви можете додавати лише адреси електронної пошти, пов’язані з обліковим записом у Webex. Адреси електронної пошти, не пов’язані з обліковим записом Webex, будуть відхилені. |
| 4 |
Виберіть ліцензії для призначення та натисніть Далі. |
| 5 |
Виберіть тип облікового запису, який потрібно призначити, а потім натисніть Зберегти. Кожному зовнішньому користувачеві надсилається електронний лист із запрошенням приєднатися.
|
Додавання зовнішніх користувачів за допомогою CSV-файлу
Шаблон CSV дозволяє додавати велику кількість зовнішніх користувачів і призначати їм послуги одночасно.
| 1 |
З перегляду клієнта в Центрі керуванняперейдіть до . |
| 2 |
Виберіть стрілку розкривного списку поруч із пунктом Додати зовнішнього користувача та виберіть Керування зовнішніми користувачами за допомогою CSV. |
| 3 |
Натисніть Завантажити CSV або Завантажити шаблон CSV. |
| 4 |
Введіть інформацію про нових користувачів у нових рядках у CSV-файлі.
|
| 5 |
Натисніть Імпорт, виберіть оновлений CSV-файл і натисніть Далі. |
| 6 |
Клацніть Надіслати. |
Видалити зовнішніх користувачів
Ви можете видалити зовнішнього користувача, який прийняв ліцензію, видаливши всі ліцензії, призначені цьому користувачеві, з вашої організації.
Перш ніж почати
Ви не можете видалити користувача, у якого є запрошення, що очікує на розгляд. Можливо, вам доведеться зачекати до 15 днів, поки не закінчиться термін дії запрошення, перш ніж цього користувача буде видалено з вашої організації. Якщо користувач має лише запрошення на отримання ліцензії від вашої організації, і термін дії запрошення закінчується, то цього користувача автоматично видаляють з вашої організації.
| 1 |
У режимі перегляду клієнта в https://admin.webex.comперейдіть до розділу Користувачі, а потім виберіть Зовнішні користувачі. |
| 2 |
Клацніть на зовнішньому користувачеві та виберіть Редагувати ліцензії. |
| 3 |
Зніміть позначки з усіх призначених ліцензій і натисніть Зберегти. |


